

You'll need:
- a Moleskin notebook lookalike (A5 format) that is sold in the top floor at Müller in Čopova Street (The original Moleskin notebook costs around 15 euros, whereas the Moleskin lookalike in Müller costs only 4 euros)
- scissors
- a long ruler
- some glue (I used UHU All Purpose)
- self adhesive transparent vinyl /a.k.a. a clear plastic film (also available at Müller) for about 3 euros
- a bunch of old fashion magazines
Let's start at the beginning, shall we? Got your fashion magazines? :)
 Cut out all the pretty, inspiring pictures.
Once you've chosen all the pictures, you're going to glue them in layers on the blank front page of your notebook. I've decided to go for a bit more oriental feel and used this picture as a basis for my personalized agenda:

I fell in love with this Indian arch thing and I've decided I was going to keep it in the background. Then, I glued another magazine clipping over it:
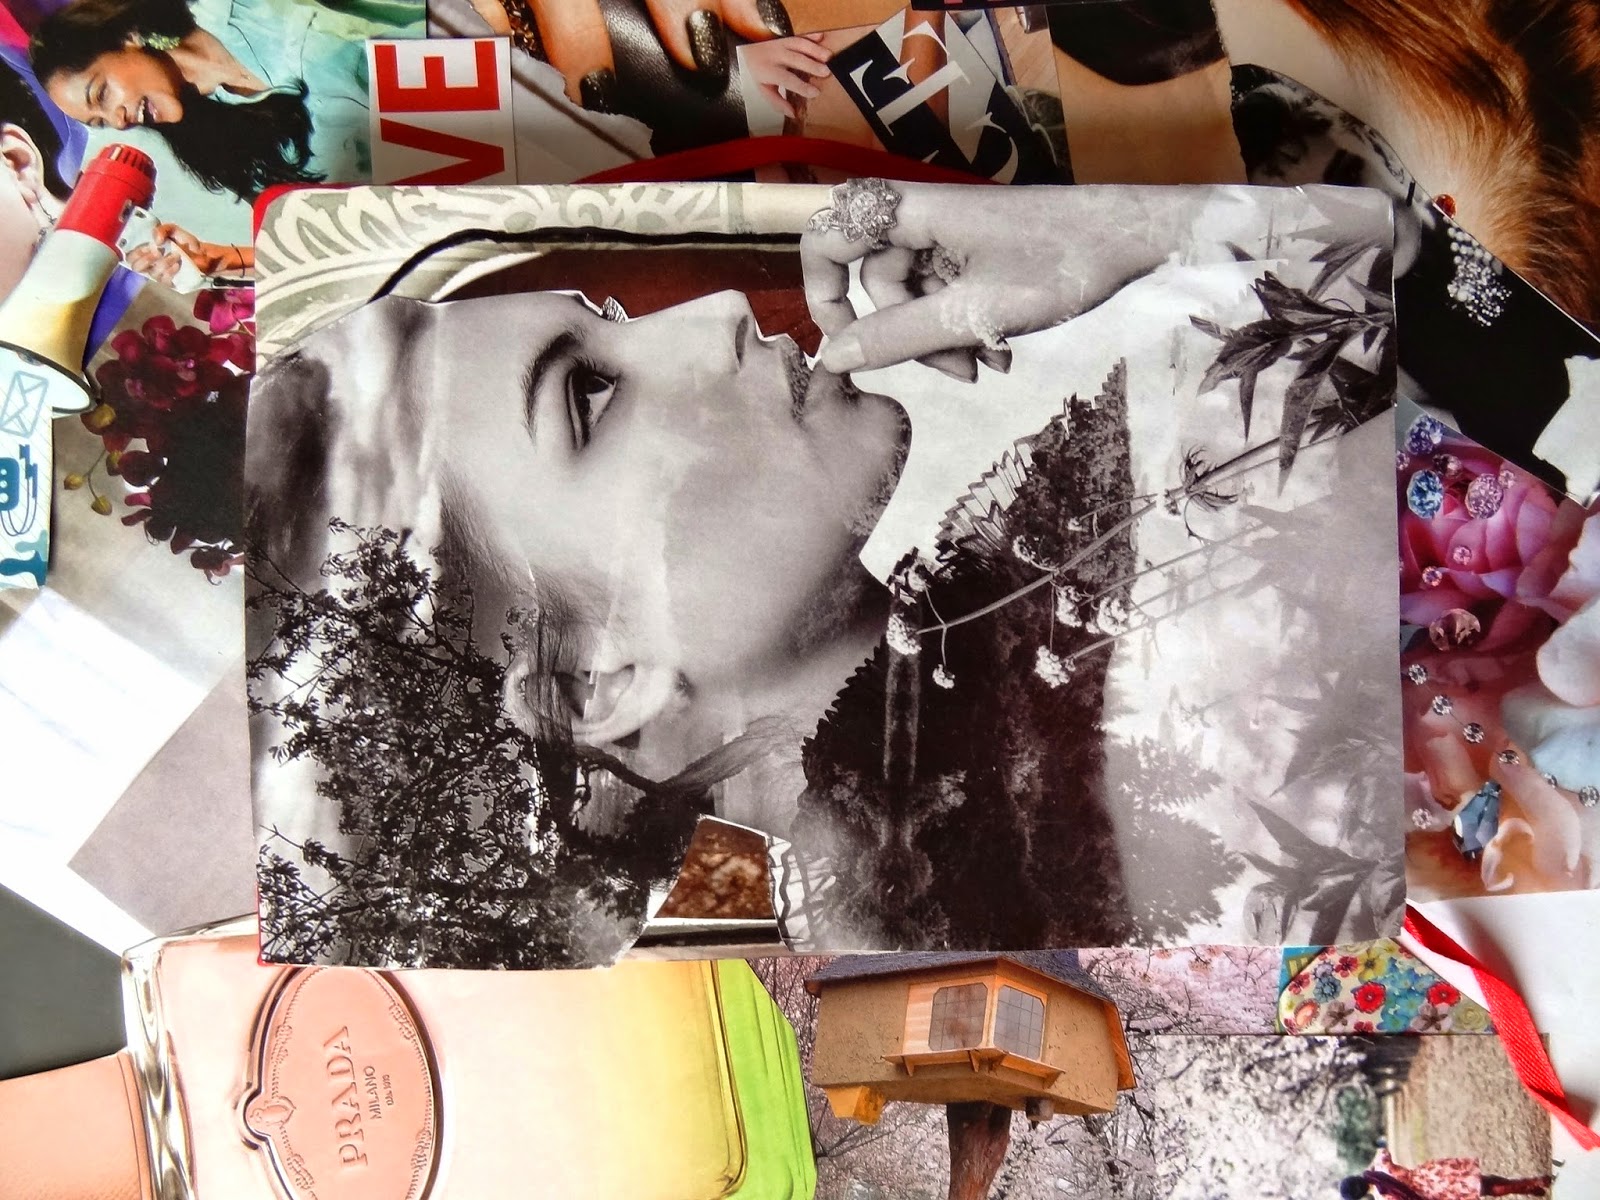
Then, I layered some other clippings over it, to make it more lively and chic:


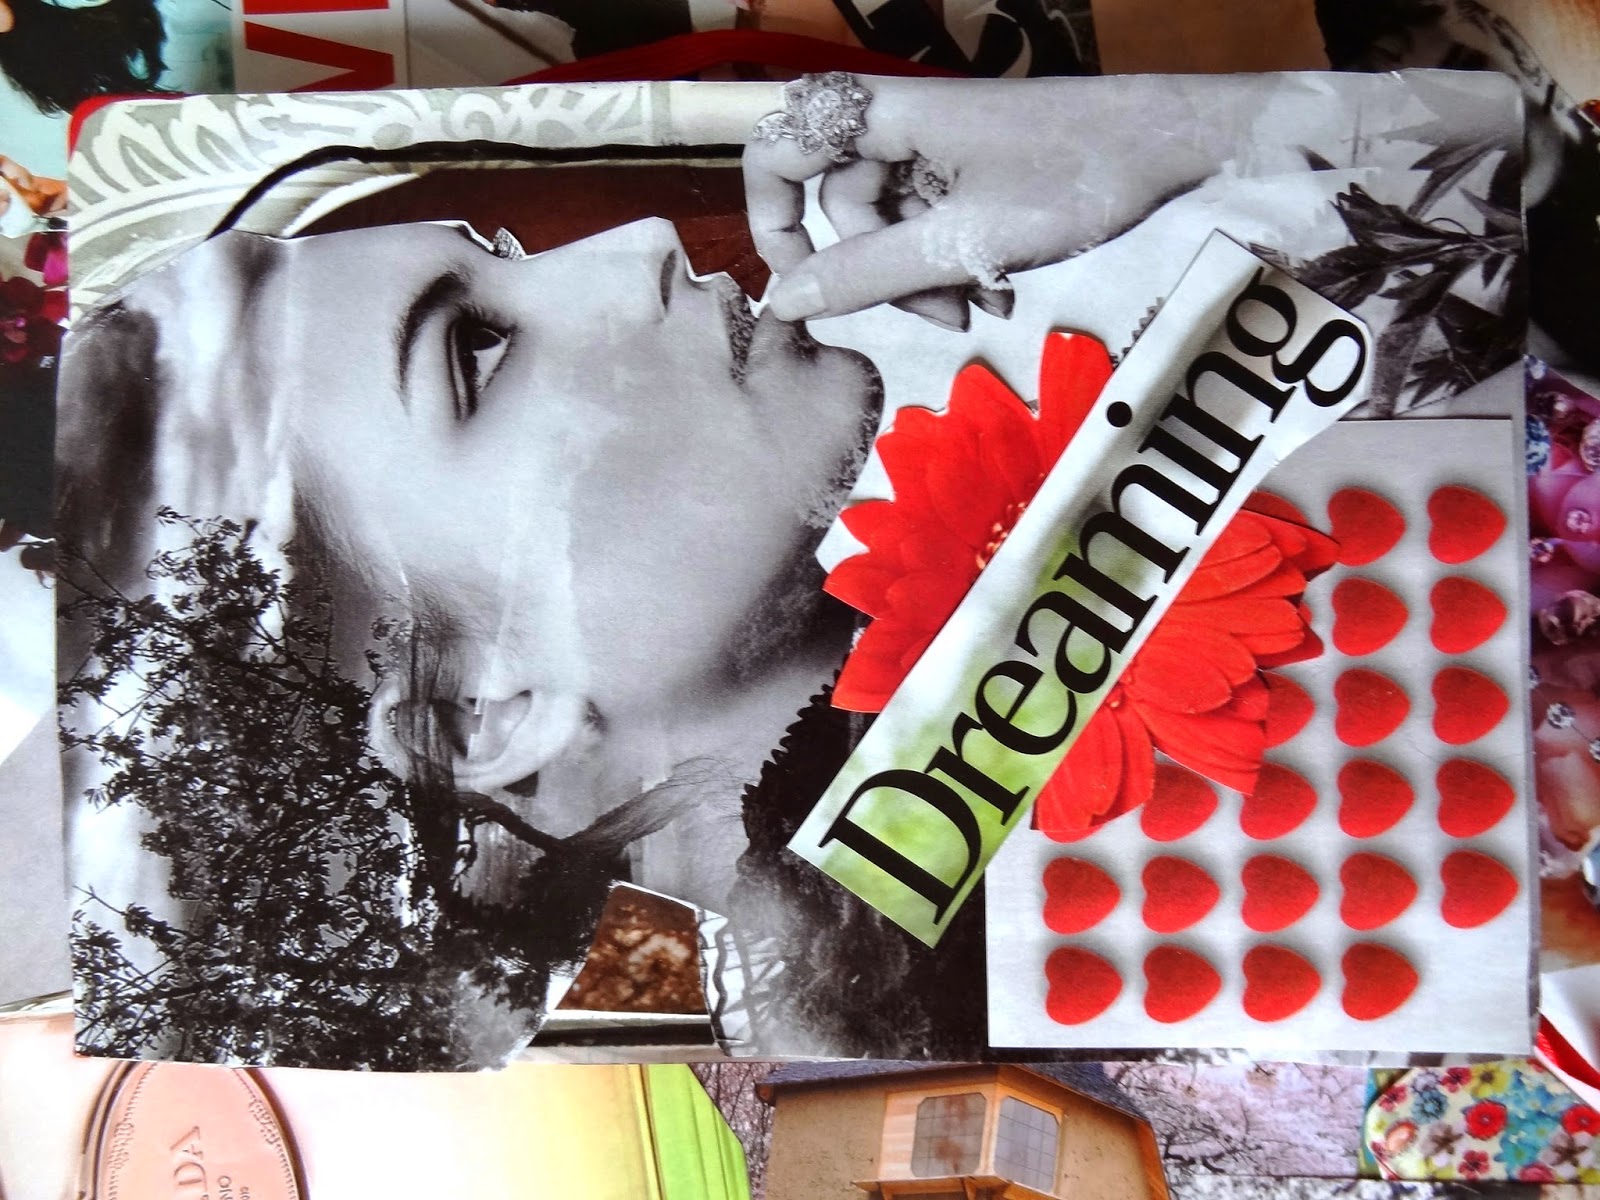
I've decided that this was going to be the finished product. Of course, I could have gone crazy and just layer other stuff over it, layer after layer, but I really like this composition. The problem with layering things is that if you use them on a daily basis, and put them in and out of your bags, pictures are eventually going to start falling off, they'll get wrinkled, so the best was to protect your notebook from all this is to wrap it in self adhesive transparent vinyl a.k.a. plastic film. It gives the notebook a really beautiful professional finishing touch and the notebook looks like it was bought in a shop:)
Here's how you wrap your notebook in the plastic film:


And voila! The finished product is here:)

I hope you've found this tutorial helpful:)
Have a happy Saturday!
Love, Teja xoxox
Follow me on:
No comments :
Post a Comment
Thank you for your comment. I love them:)